You may see BTC Broadband trucks and crews in your neighborhood as we upgrade from older copper lines to a new fiber‑optic network. This brings faster speeds, improved reliability, and more stable performance. Expanding our fiber network is ongoing, and each neighborhood we complete brings us closer to delivering fiber internet to every home in our community.
Installing new fiber lines involves a careful six-step process designed to minimize disruption and maintain a safe environment for everyone. Here are the steps:
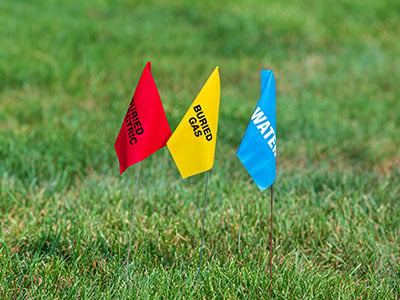
Step 1:
Planning a Safe Route
Our top priority is safety, and we begin by trusting our friends at OKIE811 to accurately mark any existing buried lines that pose hidden hazards. This also ensures that no other essential services are disrupted during our installation. It’s the law to call OKIE811 at least 48 hours before digging for any-sized project, and for a large project like laying fiber-optic cables, this is a vital step.
Once we are sure of the locations of all underground hazards, we map the shortest possible route to lay the fiber-optic cables.
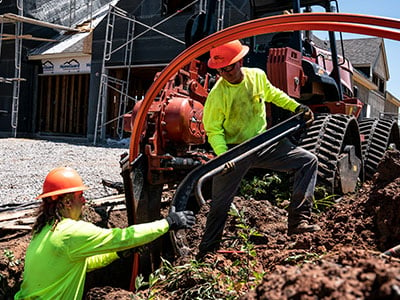
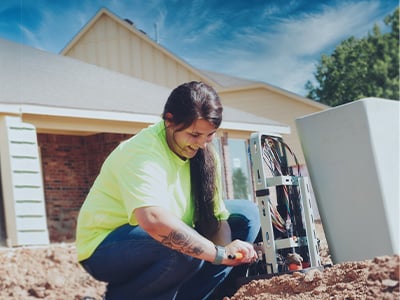
Step 2:
Laying Down New Lines
After we plan the route, we can dig along an optimal path to run the line from our pedestal to your home for maximum performance.
We begin construction with extra care to minimize disruption to the surrounding landscape during fiber-optic cable installation. We use specialized equipment, such as plows and bore rigs, to access hard-to-reach areas. Thanks to this equipment, we can bury lines quickly.
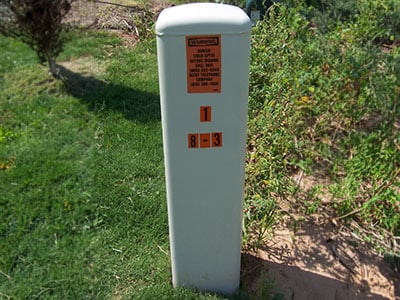
Step 3:
Pedestal Placement
The next step involves our team strategically positioning fiber pedestals (PEDS) in the area. These pedestals, usually green in color, connect the buried residential lines to our main network connection. These bring the fiber-optic network to your residence and are crucial components of the network technology that ensures smooth performance.
We usually install these pedestals in the front or rear utility easements of the residence. On average, each pedestal can serve four houses, depending on how the neighborhood is designed.
Step 4:
Fiber Splicing
The splicing process starts at the Fiber Distribution Terminal (FDT), where we prepare the fiber cables for installation. An FDT is the main serving terminal that will have all the feeder fibers, splitters, and distribution cables.
Like putting puzzle pieces together – we carefully measure and connect multi-directional fiber cables, including the feeder fiber. This feeder fiber is pivotal, as it feeds the splitter shelf before branching out to houses via drop fibers, playing a crucial role in service distribution.
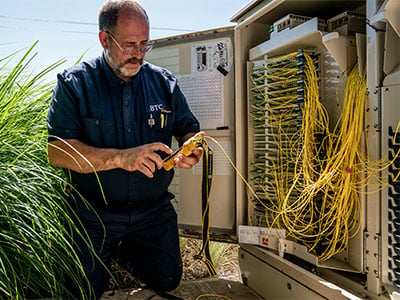
Step 5:
Splicing Completion
The project is then in the hands of our dedicated splicing team, where precision is paramount in preparing the PEDs. In this meticulous process, the outer layer of the fiber cable is delicately opened to access the inner tubes, and both sides are carefully bonded for minimal loss on the fiber route. Each PED is then assigned a specific fiber, organized on trays for future customers. Our splicing team repeats this process for each new PED, ensuring the interconnected fibers are connected and functioning properly and ready to connect to your home.

Step 6:
Customer Activation
Once all other phases are complete, it is time to switch on your fiber network! At this point, customers can fully take advantage of the benefits of fiber.
Our team performs tests to ensure everything is running smoothly. If any issues pop up, we are on it. We are here to assist you every step of the way, ensuring a seamless and trouble-free transition to your new high-speed internet connection.
The fiber conversion process is not just about cables; it's about bringing you faster, more reliable internet. Stay tuned for updates as we work hard to make it happen! Remember that installation time can vary depending on several factors, but the estimated time is usually around 2 months.
BTC takes full responsibility for any damages incurred during the fiber construction phase. We use only licensed plumbers and qualified contractors to complete all repairs. If damage occurs to sprinkler lines, our team will address those repairs promptly. Once construction is complete, we ensure the work area is thoroughly cleaned and replace any sod as needed. To report any damages to your property, please email customerservice@mybtc.com.

When you are ready to get fiber service, reach out to us to get your neighborhood on our fiber conversion schedule!
Call BTC to switch today
(918) 366-8000